Save 30% off Any Shed Plan Purchase!
Signup For My 'Shed n Sight' Newsletter
and Get Your 30% off Promo Code To Use At Checkout.
- Home
- How to build shed doors
- Single Shed Door Construction
Building Single Shed Doors Made Easy
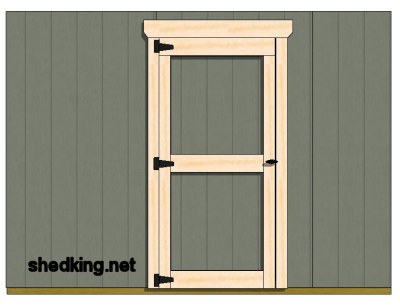 How To Build a Single Shed Door
Here's a simple, fast, and very easy way to build your single shed doors up to 36" wide. You could go wider, but any wider than 3' would necessitate the building of double shed doors as the weight would be too heavy.
Our example will be to frame in a single swing shed door on a 10' long wall. This method will work for placement of the door anywhere you want but for example sake, we will be building this shed door 3' from the right side and it will be a 3' wide door.
Here's what the framing will look (below) like for this shed wall, with our wall height being just shy of 7'. 7' is a typical height for shed walls. If you are wanting to put in a pre-hung exterior door, then 8' would be your ideal wall height.
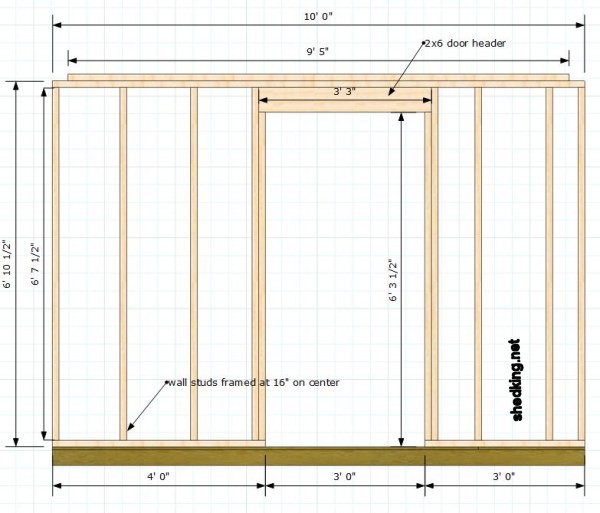
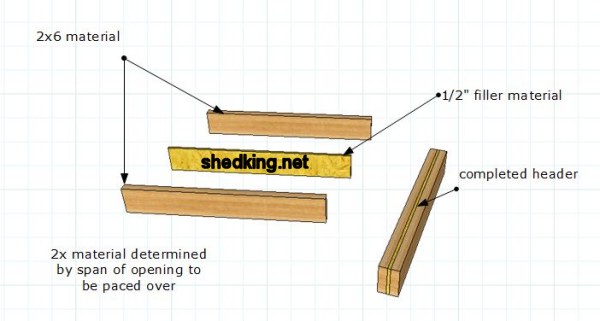
For this door opening we will have a 2x6 header framed in above the door opening. Construction of a door header is shown below.
The framed wall shown above is without any other walls showing for illustration purposes only. Your shed will probably have all walls up and possibly the roof framed before any door construction occurs!
If you are siding with a material like t1-11 or LP smartside siding panels, or putting lap siding over 1/2" osb, this method works great!
Take a sheet of siding mentioned above and cut it too length so that you will have a 1.5" to 2" overhang at the bottom past the floor. This is for weather protection. Nail on your siding panel (the full 4' width) so that the entire door opening is covered up but your panels vertical edges fall right in the middle of the wall studs.
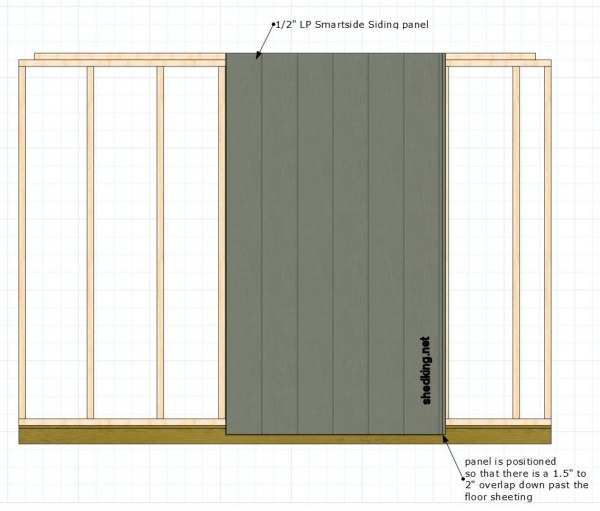
This panel can be nailed to your wall framing with spiral 8d box galvanized nails. Just make sure not to nail the bottom under the door opening as we will be cutting our panel out to use for our door.
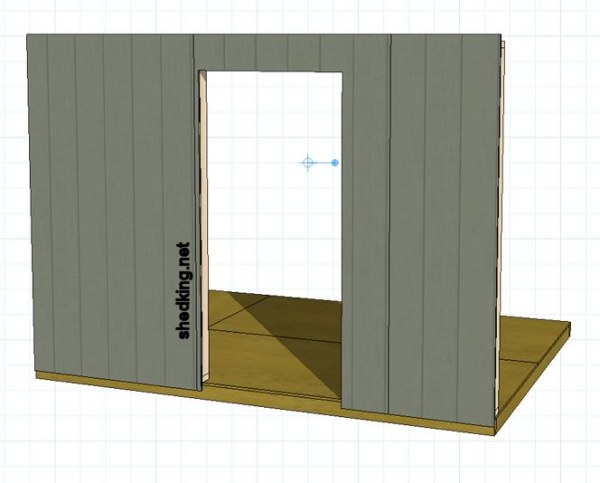
The easiest way to cut this panel out is to use a reciprocating saw or sawzall saw. Start on the inside and cut the siding out along the framed door opening all the way around down to the floor. The very bottom of the door will have to be cut out from the outside using your sawzall saw or a circular saw set to the depth of your siding thickness. When you are done, your wall with cutout will look like this:
With our door panel cutout, set it aside. We want to next nail on 2x4's around the outside edges and make a 2x6 lentil for the top of the door as shown below.
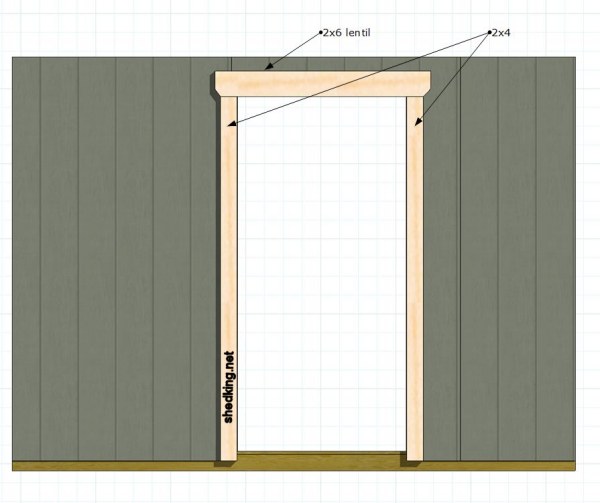
Next step is to frame out our cut out door panel with 2x4's and 2x6's. These can be attached with 8d spiral galvanized box nails nailing from the siding side into the 2x material. Frame out the door panel as shown in the illustration below. Attach the hinges to the door, and place a temporary 2x4 nailed to the floor so that you can rest the door while attaching the hinges to the framing around the door opening.
The 2x material around the perimeter of the door panel should be flush with the panel edges. This will allow you sufficient clearance for the door swing.
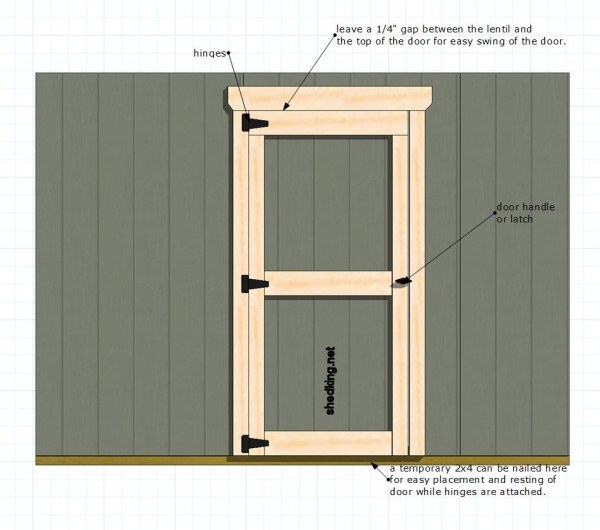
The 'T' style shed door handle shown on this shed door is available on my website. Please use this link to check it out. This is a great supplier of shed door stuff and windows, etc.
Monthly DIY
Shed-in-sight
Newsletter
Subscribing will get you discounts on shed plans, monthly updates, new shed design ideas, tips, exclusive discounts on shed building resources and tools. Learn more here.
Recent Articles
-
Quail habitat
Feb 16, 26 07:01 AM
I am building a quail habitat. I need a roof, and I am using treated 4x4 as a base for the shed, with wire cloth running under the 4x4 and attaching it -
12x16 Barn with Porch Plans, barn shed plans, small barn plans
Feb 08, 26 09:53 AM
Easy 12x16 barn shed plans with porch. How to build a small barn using 3d construction models , building guides and materials lists. -
Pictures of Sheds Built By Shedking Customers
Jan 29, 26 06:39 AM
Visit our library of pictures of sheds built from our shed plans. Get great shed design ideas and plans for storage sheds, garden sheds and more.
My You Tube Videos


