Want to Save 30% off Any Shed Plan Purchase!
Signup For My 'Shed n Sight' Newsletter
and Get Your 30% off Promo Code To Use At Checkout.
- Home
- Shed Roof Framing
- Shed Roof Overhangs
Here's How to Install
Shed Roof Flys and Side Overhangs
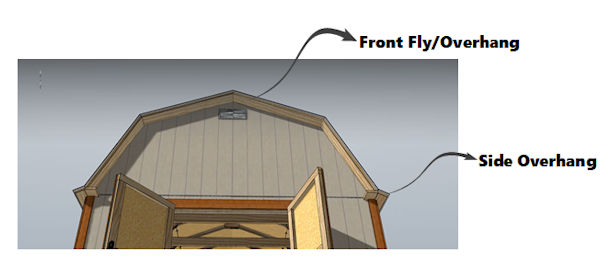 Front and Rear Shed Roof Flys and Side Overhangs
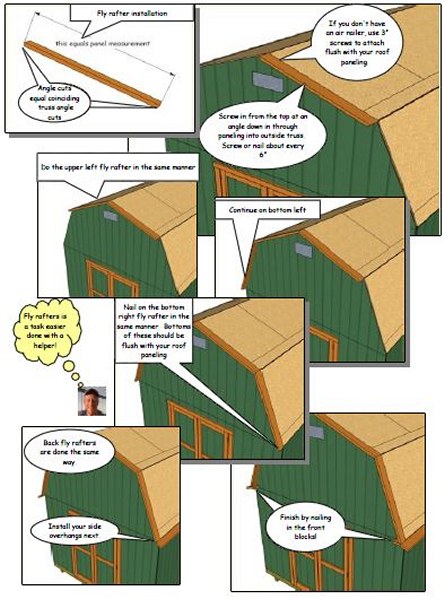
The shed roof flys are exactly as shown in the plans your received from shedking and are built using 2x6's or 2x4's. After you have your roof sheeting on, measure down from the peak to the middle roof angle. this measurement is the length of your top fly. You will want to cut both ends at 22.5° (or whatever your top rafter/truss angles are). Using a helper, hold this fly in place, and either toe nail it to your shed or screw it. It doesn't matter as either is acceptable. You would be toe nailing from the top edge at an angle down into the siding and penetrating the roof truss/rafter. Nail about every 8" with 16d nails or 3" screws. Your screws should preferably be exterior construction screws.
Next, measure down from the top edge of your just installed top fly down to the bottom of the roof sheeting or the top edge of your siding, it doesn't matter as both would be the same.
This measurement will be the length of your lower fly and gets nailed or screwed the same way.
Now, its time to install the 2x block just underneath the bottom fly. measure and cut to fit. This gets attached by nailing it up into the bottom of the lower fly, and you can also toe nail it from the bottom into the siding through the top plate.
Do the opposite side in this same manner so when you have completed this, the front will be totally done.
Do the rear of the shed next using the same steps.
The side overhangs will have to be made by cutting 2 - 2x6's joined together and equaling a total length that equals from the front edge of the front fly to the back edge of the back fly.
The side overhang has one beveled edge on it that should be cut using a table saw with the blade set to 22.5°. This overhang gets toe nailed into the side of the shed so that the top edge is flush with the bottom edges of the flys. Nail into adjacent roof truss locations with 16d nails.
Larger image of the above here in pdf format.
Framing Front and Back Ladder Overhangs/Overlooks
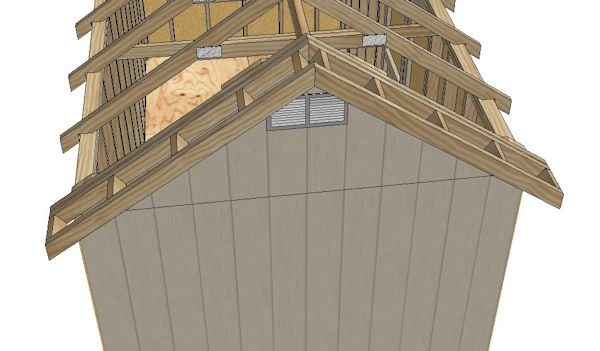 Ladder Overhangs for Your Shed Roof
Adding ladder style overhangs for the front and rear roof of your shed is relatively easy and will give a nice touch to your shed look!
As you can see from the picture above, the framing for the ladder style overhang is made by basically building a ladder out of 2x4's, or 2x6's, and attaching it to the gable ends of your shed.
This may cause you to use up a little more sheeting for your shed roof just because you will have more surface area to sheet with 1/2" osb or plywood.
Easy Steps for Building Your Shed Roof Overhangs
Add Siding to The Gable Ends First
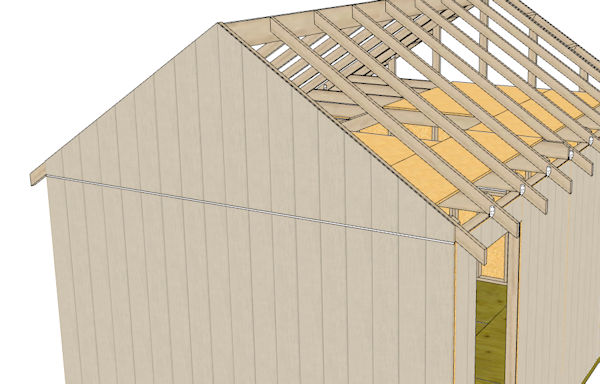 Side Your Gable Ends First!
The first step will make your shed construction a little easier if followed in this manner. Your gable ends should be sided first before attaching your overhangs. This way you won't have to have exact measurements and angles for siding your
Next Step: Build The Ladder Overhangs
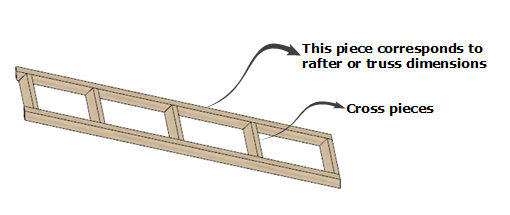 Example of Framing Your Ladder Style Overhang
Basically the pieces for your overhang will be constructed out of 2x4's or 2x6's. The longer pieces will most likely be exactly like your truss or rafter measurements with cross pieces. One important step to make sure you follow is positioning your cross pieces so that when you sheet your roof, your cross pieces should be under the edges of the sheeting so you have something to nail to. Typically your cross pieces should be spaced every 16" and nailed or screwed with 16d nails or 3" construction screws. Reference the picture below so see the correct placement of roof sheeting and crosspieces.
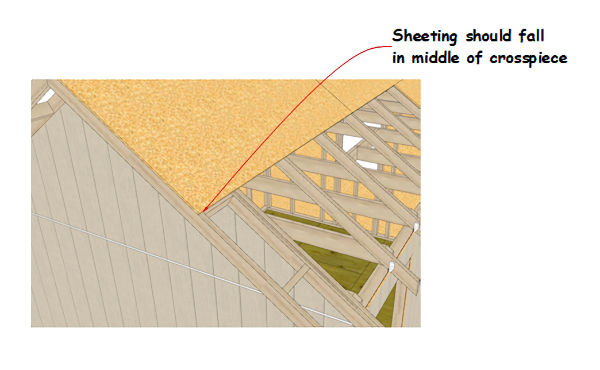 Crosspiece and Sheeting Placement
Attaching The Overhangs
Once your overhangs are built, grab a helper or two. The overhangs can be positioned right where they need to go on the gable ends, and preferably screwed into place using 3" construction screws every 12" in double rows. Start with one side first, then do the other side.
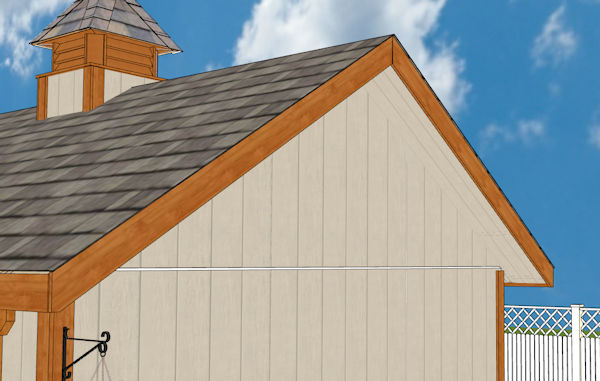 Shed Overhangs Finished Up and Looking Pretty!
Leave shed roof flys and overhangs for how to build a shed roof
Monthly DIY
Shed-in-sight
Newsletter
Subscribing will get you discounts on shed plans, monthly updates, new shed design ideas, tips, exclusive discounts on shed building resources and tools. Learn more here.
Recent Articles
-
Does Your Shed Need Shed Floor Skids?
Feb 12, 25 05:53 AM
Shed floor skids will help support your shed floor. They will also allow you to anchor your shed floor to the ground using concrete piers. See how here. -
Gusset fasteners
Feb 06, 25 06:31 AM
For fastening gussets to shed trusses, is it best to use nails or bolts? -
Easy Diy Shed Plans and Ideas For You To Build Sheds
Dec 31, 24 09:49 PM
All types of shed plans for gable, barn, saltbox, and lean to style sheds small and large that can be used for storage, shed to house, workshops and more.
My You Tube Videos
